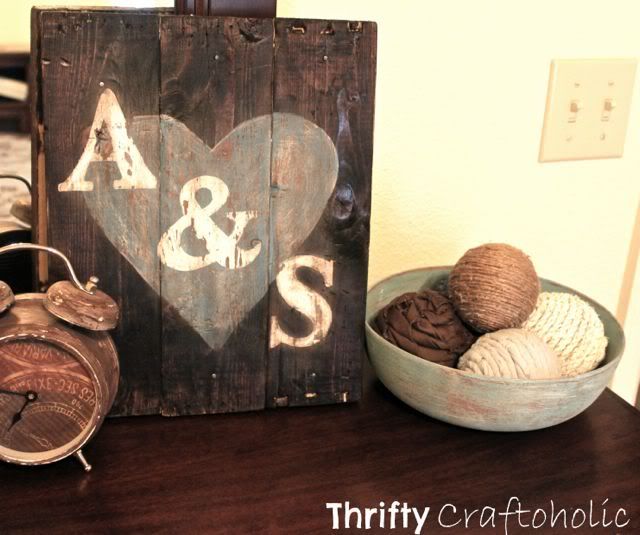
So today I am showing you guys one of my specialties, a little wood sign. Working with wood and making signs is what I love to do the most! It wasn't hard to make at all so I hope you guys are inspired to make one of your own. I am also showing how I made some of my decorative balls, I know y'all have seen it 100 times but I did mine in my own special way so I hope y'all enjoy!
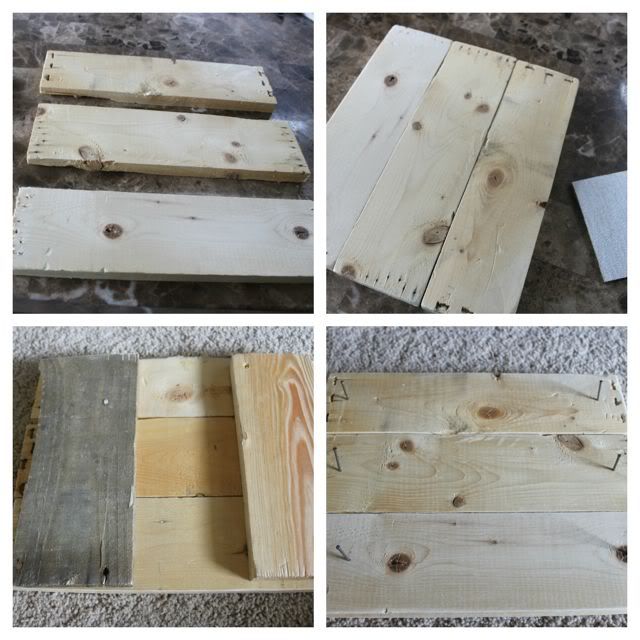
1. First you just need 3 scrap pieces of wood, my sign ended up being about 10in x 13in.
2. Then sand them down nice and smooth.
3. Next turn them over and take some scrap pieces of wood to see how they fit. These will hold all the wood together.
4. Then I flipped it back over and nailed my top pieces into the back pieces. Nothing Fancy, small nails showing don't bother me!
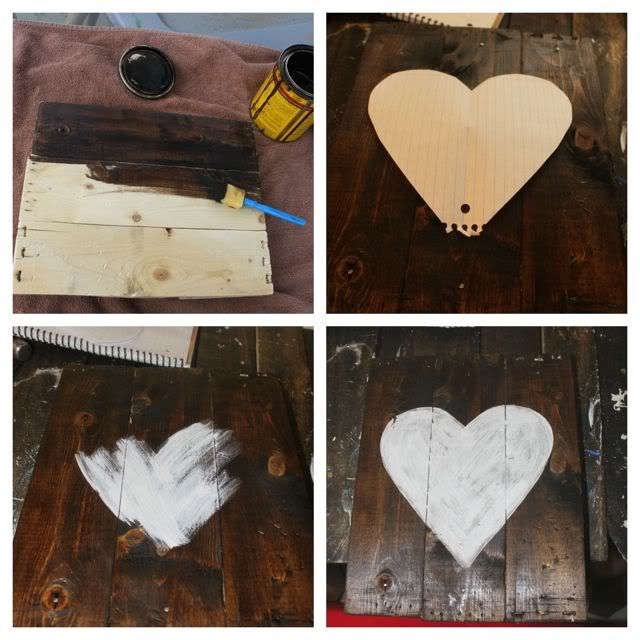
5. Then I took the darkest stain I had on hand and just went over the wood, and then wiped off the extra. Im very impatient so after about 20 minutes I started the heart.
6. Next I just traced half a heart onto some folded paper (just like they teach you in kindergarden) and then layer it out to see where I wanted it.
7. Then I just traced the heart with a pencil and started filling it in! Just one coat of white, I always do a cost of white first on everything its just a habit.
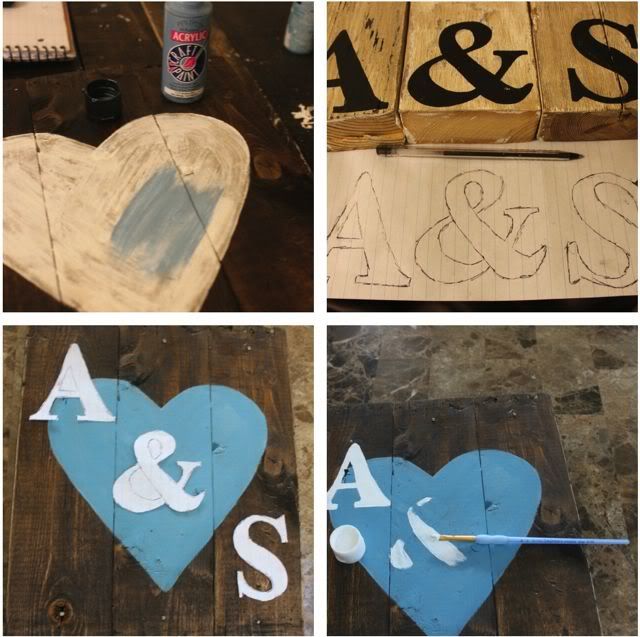
8. Then to match our bedroom (browns and blues), I filled it in with some blue. I always use the cheap craft paint you can get at walmart.
9. I usually have a different technique for doing letters on my signs but Ill show you that in another post, for this I just traced some letters I had already done on some blocks and cut them out.
10. Then just place them on your sign where you want them and trace around them.
11. Then the fun part, filling the letters in! I did a few layers but I knew I was distressing the piece also so I wasn't to worried about it being perfect.

12. Next just distress the piece, I used an old piece of sandpaper thats almost dead! Then I just took a baby wipe and wiped the wood down. And your done! Add a little clip to the back if you want to hang it, mine sits on my dresser for now.
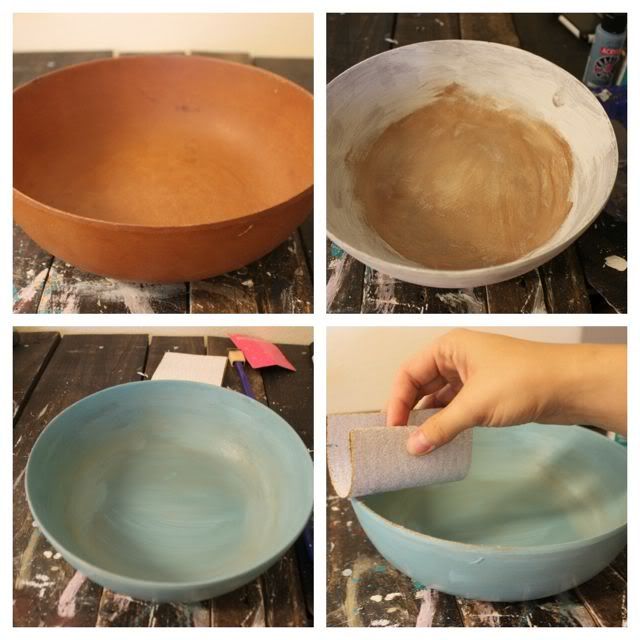
Next I will show you guys how I paint most of my pieces, there isn't a thing in my house that hasn't been repainted yet! This is a little bowl I got from the goodwill for $1
1. First I add a layer of white, then I did a layer of brown. I never wait for the paint to fully dry or rinse my paint brush. Then I mixed a few blues and added that to it, again I knew it would be distressed so I wasn't to worried about covering ever inch perfect. Then start sanding.
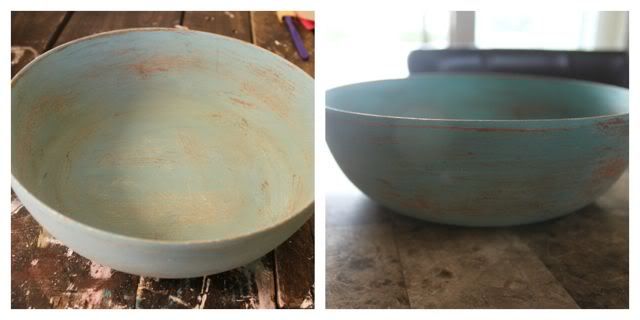
Here is how it looked after the sanding and distressing. I wasn't exactly happy with it so back to the craft room.

I decided to do some dry brushing on it. Ill explain how I do it. First you just dip you brush into your color, then dab most of the paint off, and in long strokes brush onto your piece. You can see the effect in the last picture. I did this with white and a light brown. And your done!
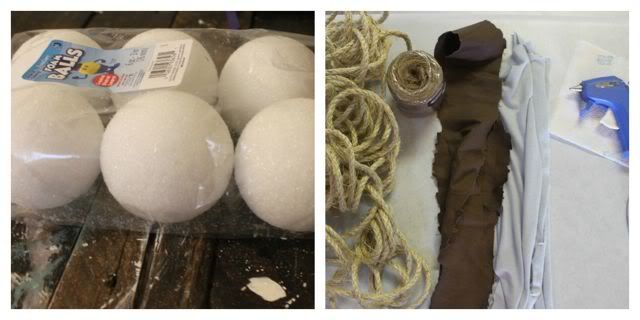
Next I am making my decorative balls. I used some rope, twine, and scrap fabric to decorate them.
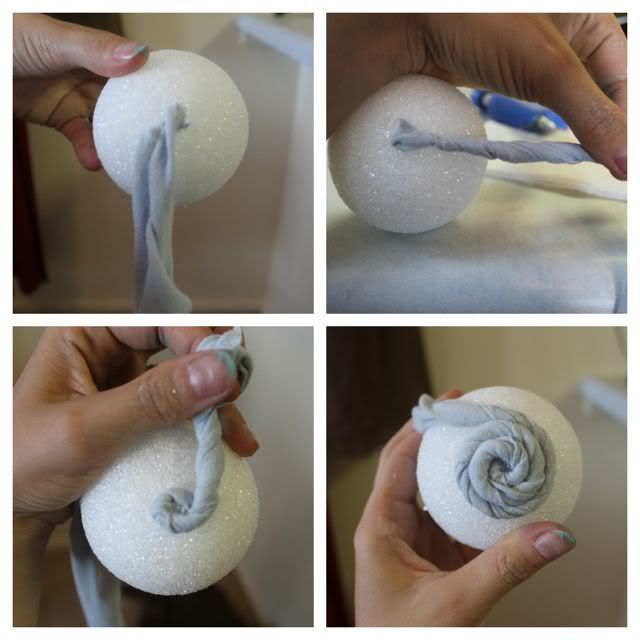
1. First you add a dot of hot glue and add your end to the glue and press. Careful not to get burned I know!
2. Then start twisting the fabric.
3. Add some glue and start wrapping the fabric around and around, twisting and glueing as you go.
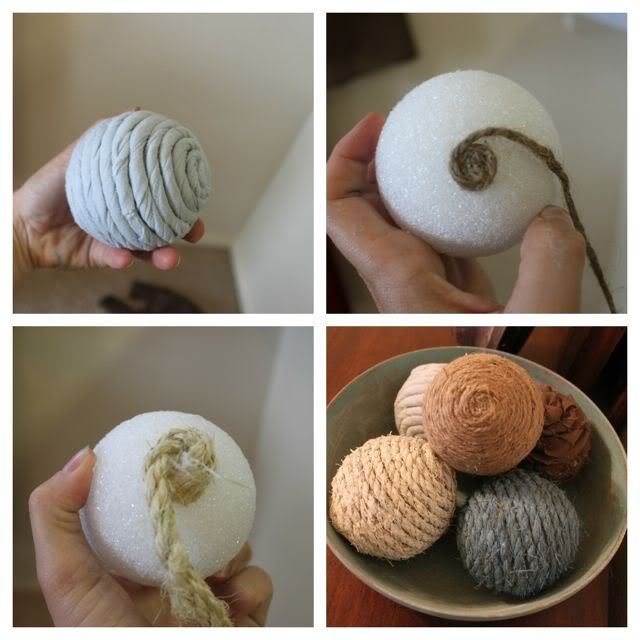
You can see the finished picture. I did the same with some brown fabric, and then did my rope and twine. The rope wasn't my favorite color so I took my walmart craft paint and just painted over the rope , I did one white and one a darker blue. They gave an awesome old, distressed look that I loved. And you done!
Thankyou guys for stopping by and I hope you guys enjoyed todays project, post and questions and comments below!

Love it! You're inspiring me to go and paint something :)
ReplyDeletelove this beautiful work
ReplyDeleteThank you!!
ReplyDeleteLove it! Great idea and LOVE that your bowl was only $1.00! You made the entire project look like the Pottery Barn!!! :D
ReplyDeleteAfter moving into our dream home, my husband finally got his man cave. He decided to go with a rustic theme design to go with our craftsman style home. We were searching the web for a company that did custom wood signs to put up the room and finally we came across Unique Custom Products. They had great pictures of other designs they had done and we decided to order. The sign that arrived was absolutely beautiful! The wood was really good quality and the engraving was flawless - it fit in well with his theme. Check them out at www.custom-woodsigns.com
ReplyDelete